Introduction to Redwood and Cedar Lumber Maintenance
Redwood and Cedar lumber maintenance may seem daunting at first but in truth, it’s not so bad. Redwood and Cedar lumber are the center stones of the Bay Area exterior construction world, known for their durability and resistance to rot and pests. If desired, a bit of care can keep them looking like new. Alternatively, these materials can be left alone to gray out gracefully over time. Either way some simple, routine care can greatly extend the life and beauty of Redwood and Cedar lumber, whether you’ve preserving a deck, fence, trellis, or siding. Things like waxing cut ends, using the correct fasteners, staining, and occasional cleaning can go a long way to maintain the lumbers color and/or extend the lumber’s useful life.
Understanding the Unique Properties of Redwood and Cedar
Redwood and cedar are unique for a few reasons, making them top picks for outdoor projects like decks and fences. First off, they both resist rot and pests naturally, thanks to their inherent oils and tannins. This means they’ll last longer outside than many other woods. Redwood, in particular, stands out for its rich color and durability, while cedar boasts a pleasant scent and dense grain structure. They don’t require heavy maintenance but do need some care to keep their looks over time.
Ways to Help Prevent Surface Checking
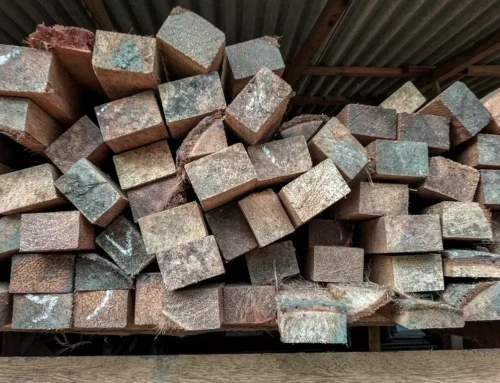
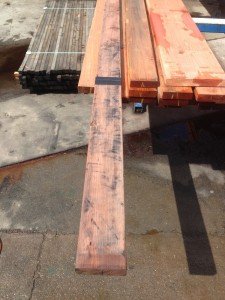
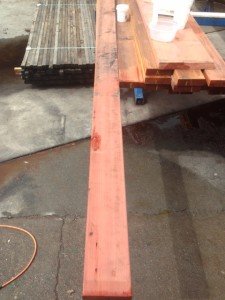
Small checks or splits are a fairly common occurrence in lumber. They form as the molecular water in freshly cut lumber escape the cells of the wood. If this natural process happens too quickly, small lines or “check marks” can become visible. Although this will very rarely if ever have a structural impact on the lumber, visually it can be undesirable. Wood wax is a great product to use to help combat this issue (we sell it here at The Lumber Baron.) The lumber’s molecular water escapes out of the cut ends the quickest, thus checking is more prone to happen at the ends of lumber boards. When you apply wood wax to the freshly cut ends, it greatly reduces this issue. The wax acts as a protective barrier and the water is forced to dissipate more evenly throughout the board. Although it does add some labor and cost to your project, customer’s who desire a more flawless appearance may find it a step worth doing.
Temperature and UV rays can also cause surface checking. If excessive, hot temperatures are expected, it may be a good idea to postpone the installation of your exterior project. Keep your lumber under a tarp, in the shade, bound together, and in layers separated by “stickers” to allow for air flow. Wait for temperatures to become more moderate before installing your redwood or cedar lumber.
Using the Correct Fasteners for Redwood and Cedar Lumber
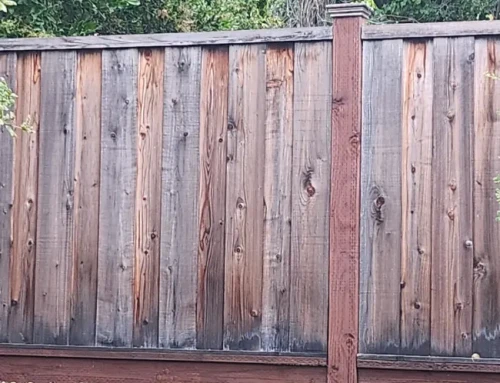
One extremely overlooked consideration when building with redwood and cedar lumber, is the use of the correct fasteners. The same tannins and oils that protect redwood and cedar lumber and make them so desirable as an exterior material choice, wreak havoc on the coatings of most screws. It may take a year or two, but those tannins and oils will eat away at the coatings of the fasteners, eventually exposing the structural metal. The results are unpleasant black streaks caused by this metal and tannin interaction. This can be more apparent on vertical applications like siding and fences but can be seen on decks as well.
Although they cost more, stainless steal fasteners are really the only way to go when using redwood or cedar lumber. They hold up well and will not break down like screws and fasteners made from other materials.
Common Initial Treatments for New Redwood and Cedar Structures
Oxalic Acid Treatment
Depending on your desired look, there maybe some initial treatments you might want to perform on your new redwood or cedar structure. Most common is known as an oxalic acid or wood bleach cleaning (also sold at here at The Lumber Baron). Shoe prints and black marks (caused by metal, water, and tannin interactions) are probably the two most common items you’ll want to clean from your project. Mixing the oxalic acid with warm water and scrubbing with a bristle brush will give you a fresh, newly installed appearance. Just make sure you follow the instructions and rinse it off and dilute around areas where you have plants.
Before
After (One 5 min. oxalic acid wash)
Going Grey
If your not one for maintenance or like the natural gray patina redwood and cedar lumber ages to, you’re pretty much done at this point. You will want to do annual or semi annual check ups, cleaning any dirt and debris you find, especially in between deck boards. Remember it’s never a good idea to pile dirt or debris against fences as the lack of air flow and moisture will rot out even the most weather resistant lumber.
Maintaining Color
If your wanting that newly installed look to last a while, applying a good oil based wood sealer is your next step. We have been carrying TWP’s 1500 series in Clear, Redwood and Cedar for 25+ years with good results. This will help amplify their natural resistance to weather, water, and sunlight. Don’t forget, the stain or sealant needs to be reapplied every few years—how often depends on your local weather conditions and the product you use. However, don’t think this is a one a done treatment. The simple fact is that these sealers only last about a year or two. Reapplications are necessary to maintain the look. This initial care might seem like a bit of effort, but is necessary for maintaining redwood’s color.
How to Apply Stain and Sealant on Redwood and Cedar Lumber
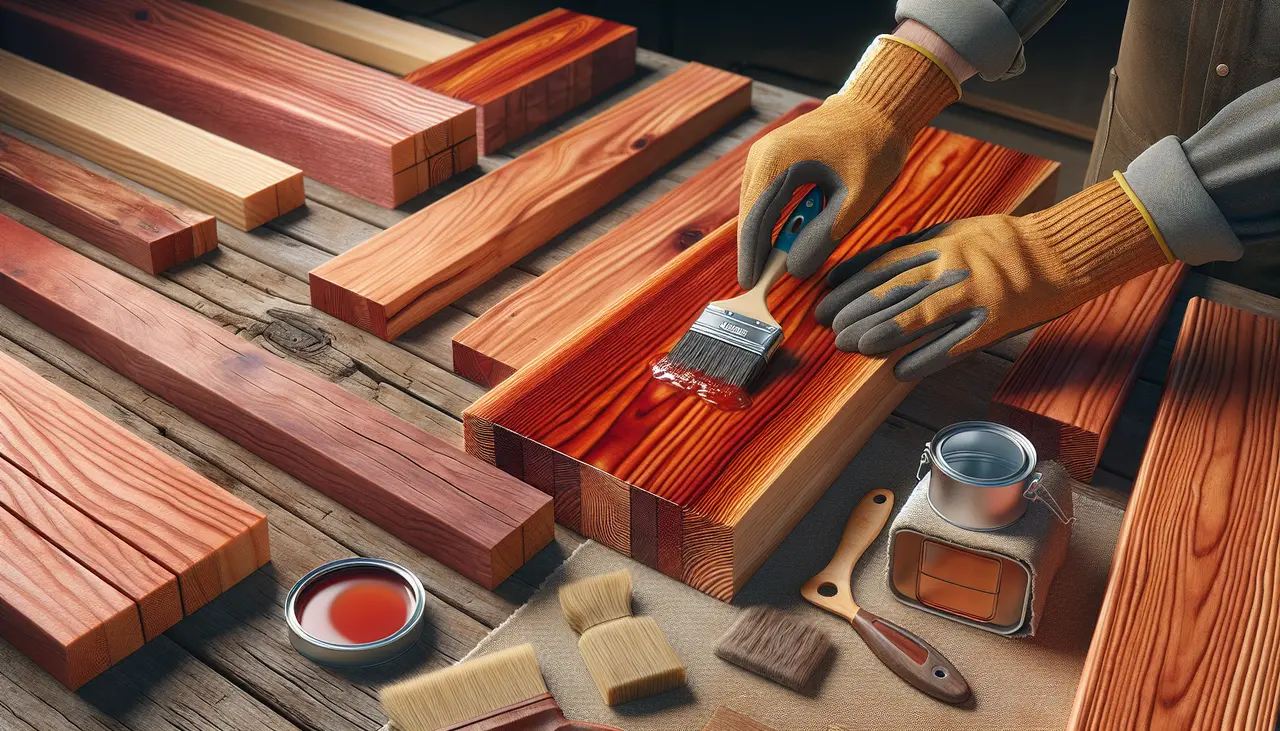
Before anything, make sure the wood is clean and dry. You don’t want to lock in any dirt or moisture. Start with the aforementioned oxalic acid wash to get your material clean and fresh. Next apply a stain that’s specifically designed for redwood or cedar like TWP. Why? These types of wood have natural oils that can interact with the stain, so you need something compatible. Apply the stain with a brush, roller, or sprayer working in the direction of the wood grain for the best look. Let it soak in for the time recommended on the product label. Remember to wipe off an excess. Allow it to dry completely before adding a second coat if needed. Remember, preparation and patience are key. This isn’t a rush job. Take your time, and your redwood or cedar will thank you by staying beautiful and sturdy for years to come.
Routine Cleaning Tips for Redwood and Cedar Lumber
Keeping redwood and cedar lumber in top condition doesn’t have to be a headache. We love these woods for their beauty and durability, but a little care goes a long way. First off, sweep off any debris, leaves, or dirt regularly. This simple step prevents mold and mildew from getting cozy. If dirt’s been hanging around for too long, grab a mild soap and a soft bristle brush. Scrub gently; these woods are tough but have feelings too. Rinse with a garden hose, not a power washer, as high pressure can be too harsh and dig into the wood’s fibers. For stubborn stains or mildew, a mixture of one part bleach to four parts water helps, but use this sparingly. Thoroughly rinse the area after. This effort pays off, preserving the wood’s natural charm and ensuring it lasts.
Full Makeover for Redwood and Cedar Lumber
The incredible thing about redwood and cedar lumber is their resilience. Even when you think the time has come to replace your older deck or fence, you may not have to. If you want to take your Redwood and Cedar Lumber maintenance to another level, try this. Unlike synthetic, vinyl, and cement lumber, you can sand down older redwood and cedar, often with dramatic results. Normally the weathered patina only penetrates redwood and cedar lumber a 1⁄16” or less. Using a floor sander and 80 grit sandpaper, you can sand an entire deck quickly, resulting in a new looking deck that will last for many more years. Don’t believe me, check out the incredible transformations of the reclaimed lumber products we sell when freshly milled.
Frequently Asked Questions
1. How often should I clean my redwood or cedar deck or siding?
A light cleaning once or twice a year is usually enough. Use a soft brush and a mild wood cleaner to remove dirt, pollen, and mildew. Avoid harsh chemicals or high-pressure washing, as they can damage the surface.
2. Do redwood and cedar need to be sealed or stained?
While both woods naturally resist decay, applying a quality sealant or stain helps retain their colour and offers added protection from moisture and UV rays. It’s a good idea to reapply every 2–3 years, depending on sun exposure.
3. What happens if I leave redwood or cedar unfinished?
Unfinished redwood and cedar will gradually weather to a silvery-grey tone. This change is purely cosmetic—structural integrity is maintained—but sealing helps prevent surface cracking and discolouration from moisture.
4. How can I prevent mildew and mould on redwood or cedar?
Ensure proper airflow around the wood, especially in shaded or damp areas. Regularly remove leaves or debris, and consider using a wood-safe cleaner with a mild anti-fungal agent if buildup occurs.
5. Are redwood and cedar prone to splitting or cracking?
Like all wood, some checking (small surface cracks) is natural. Keeping the wood properly sealed and avoiding direct contact with wet soil can help minimise splitting over time.
6. Can I pressure wash redwood or cedar?
It’s best to avoid high-pressure washing, as it can erode the wood fibres. If needed, use a low-pressure setting and keep the nozzle several inches away to gently rinse off surface grime.
7. How can I maintain the colour of redwood or cedar over time?
To maintain the rich red or golden hue, apply a UV-blocking wood stain or sealer specifically designed for redwood or cedar. Reapplication every couple of years helps keep the colour vibrant and protects the surface.